Wanted to drop a quick how-to on how to report back up to CloudWatch from a CoreOS instance in Amazon. This is a bit of a lab project, something I was thinking about and decided to try. Fair warning that I haven’t used this with any serious workloads or anything.
If you’ve never used it before, CloudWatch is an AWS service that allows you to gather metrics and trigger alarms based on those metrics. This is core to having a robust architecture in Amazon and being able to scale instances in your autoscaling groups. By default, only hypervisor level data is available to act upon: CPU %, Network I/O, or Disk I/O. In order to get some other actionable metrics like disk and RAM usage, we want to make use of the CloudWatch Monitoring Scripts found here.
Containerize Custom Metrics
Let’s bundle all the necessary bits we need to report up to CloudWatch inside of a container image. That is the CoreOS way after all!
- Create two files,
Dockerfileandentrypoint.sh - Open
Dockerfilefor editing:
FROM alpine:3.5

##Install perl packages and pull CloudWatch scripts
RUN apk add --no-cache perl-libwww perl-datetime
RUN wget http://aws-cloudwatch.s3.amazonaws.com/downloads/CloudWatchMonitoringScripts-1.2.1.zip && \
    unzip CloudWatchMonitoringScripts-1.2.1.zip && \
    rm CloudWatchMonitoringScripts-1.2.1.zip
WORKDIR aws-scripts-mon

##Copy entrypoint and make it executable
COPY entrypoint.sh entrypoint.sh
RUN chmod +x entrypoint.sh

##Simply run entrypoint
CMD ./entrypoint.sh- And now
entrypoint.sh:
#!/bin/sh
while true; do
  ./mon-put-instance-data.pl --mem-util --mem-used --mem-avail \
  --disk-space-avail --disk-space-used --disk-space-util --disk-path=/rootfs \
  --aws-access-key-id $AWS_ACCESS_KEY_ID --aws-secret-key $AWS_SECRET_ACCESS_KEY
  sleep 60
done- In the bash script, let’s note that the disk-path we’re pointing to is /rootfs. I couldn’t find a great consensus on whether the value reported inside the container a
/was accurate since it points to the overlay. We’ll work around this by mounting the/directory from the host as read only.
Test It
We can see if our container works simply by building and running.
On a CoreOS VM in AWS:
docker build -t cloudwatch-mon .(In the same directory as the Dockerfile and entrypoint.sh script)- Run the container, filling in the AWS credentials as needed.
docker run -ti -e AWS_ACCESS_KEY_ID="abc" \-e AWS_SECRET_ACCESS_KEY="123" -v /:/rootfs:ro cloudwatch-mon
You should see some output that shows that it’s sending data to CloudWatch:
core@ip-172-31-17-23 ~ $ docker run -ti -e AWS_ACCESS_KEY_ID="aaabbbccc" -e AWS_SECRET_ACCESS_KEY="111222333" -v /:/rootfs:ro cloudwatch-mon

Successfully reported metrics to CloudWatch. Reference Id: 123-00cc-11e7-b3bc-abc


Successfully reported metrics to CloudWatch. Reference Id: 123-00cc-11e7-b3bc-abc


Successfully reported metrics to CloudWatch. Reference Id: 123-00cc-11e7-b3bc-abc
...- At this point we can push it to the Docker hub so that we can pull it down on other hosts as well.
Wrap It Up
Now that we’ve got a working Docker image, we can wrap it in a systemd service definition. Note that the same service setup could be added to cloud-config and automatically configured for new hosts.
- Create a credentials file at
/root/.aws/creds. It should look something like:
AWS_ACCESS_KEY_ID="aaabbbccc"
AWS_SECRET_ACCESS_KEY="111222333"- Now create a service file at
/etc/systemd/system/cloudwatch.service. Populate it with:
[Unit]
Description=cloudwatch docker wrapper
Wants=docker.socket
After=docker.service

[Service]
EnvironmentFile=/root/.aws/creds
User=root
PermissionsStartOnly=true
ExecStart=/usr/bin/docker run -e AWS_ACCESS_KEY_ID=${AWS_ACCESS_KEY_ID} \
-e AWS_SECRET_ACCESS_KEY=${AWS_SECRET_ACCESS_KEY} \
-v /:/rootfs:ro --name=cloudwatch-mon cloudwatch-mon
ExecStartPre=-/usr/bin/docker rm -f cloudwatch-mon
ExecReload=/usr/bin/docker restart cloudwatch-mon
ExecStop=/usr/bin/docker stop cloudwatch-mon
Restart=always
RestartSec=15s

[Install]
WantedBy=multi-user.target- Issue
sudo systemctl daemon-reload - Start the monitoring service with
sudo systemctl start cloudwatch - You should see that it’s reporting upstream with
sudo systemctl status cloudwatch - Finally, you can head to the CloudWatch dashboard. The link should look something like:
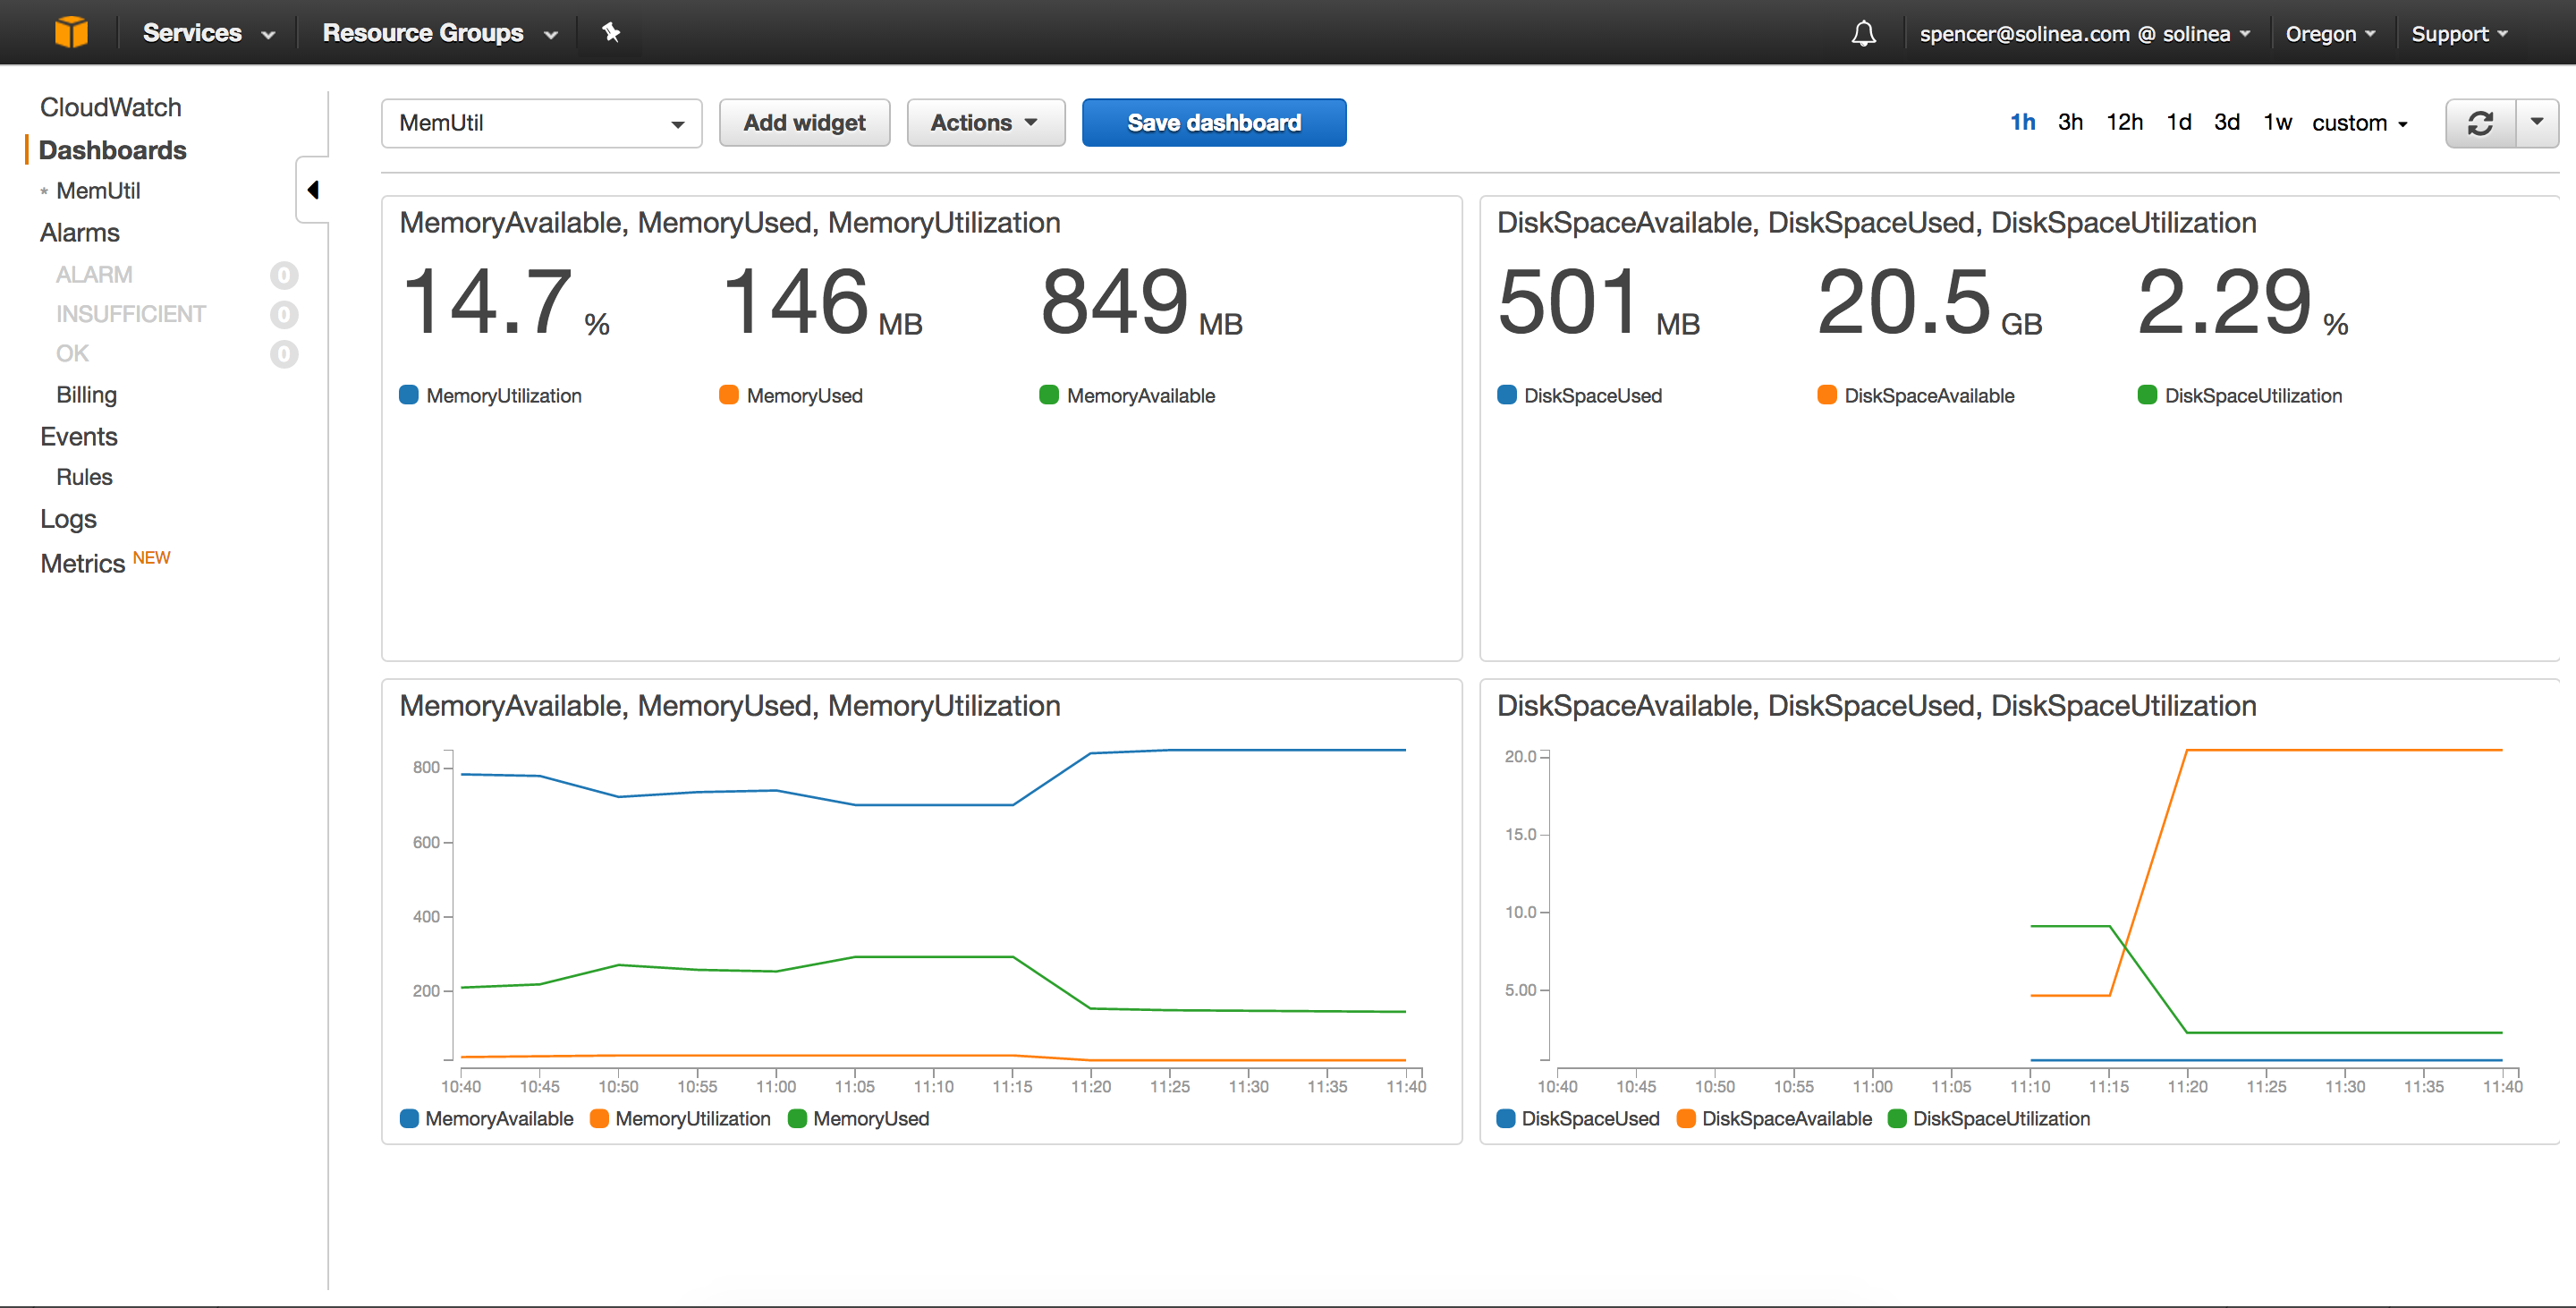
https://us-west-2.console.aws.amazon.com/cloudwatch/home?region=us-west-2 - Once there, you should see metrics under “Linux System” that show the disk and RAM usage.
- You can also create some dashboards. Here’s what I was able to quickly mock up:
