Continuing on my thread of exploring new technologies for my new job, today I’ll be looking at CFEngine and how we can use it for configuration management. I’ve used other tools like Chef and Ansible in the past, but CFEngine is a new one for me. I’ll be installing and configuring a server and some nodes in my home Openstack lab.
##Setup the Server## I’m going to use the instructions for CFEngine enterprise for this tutorial. It appears to be free for the first 25 nodes, so it will be nice to test against the version that I may actually have to use at work.
-
Create a server in Openstack and go ahead and SSH in. I had to use a Ubuntu 12.04 LTS image for this. 14.04 LTS returned an error about not being supported. I imagine that will be fixed in the future.
-
Open the /etc/hosts file for editing and add an entry for the private IP address to give it a hostname. The script below with fail if
hostname -fdoesn’t return anything. I added this to my hosts file:10.0.0.29 cfengine-server.localdomain. You may also have to entersudo hostname cfengine-server.localdomain. -
Grab the CFEngine install script with
wget http://s3.amazonaws.com/cfengine.packages/quick-install-cfengine-enterprise.sh. -
Make it executable with
chmod +x quick-install-cfengine-enterprise.sh. -
Run the script with sudo rights and pass the hub argument to specify that this will be a central hub server:
sudo ./quick-install-cfengine-enterprise.sh hub -
Bootstrap the CFEngine hub with
sudo /var/cfengine/bin/cf-agent --bootstrap 10.0.0.29 -
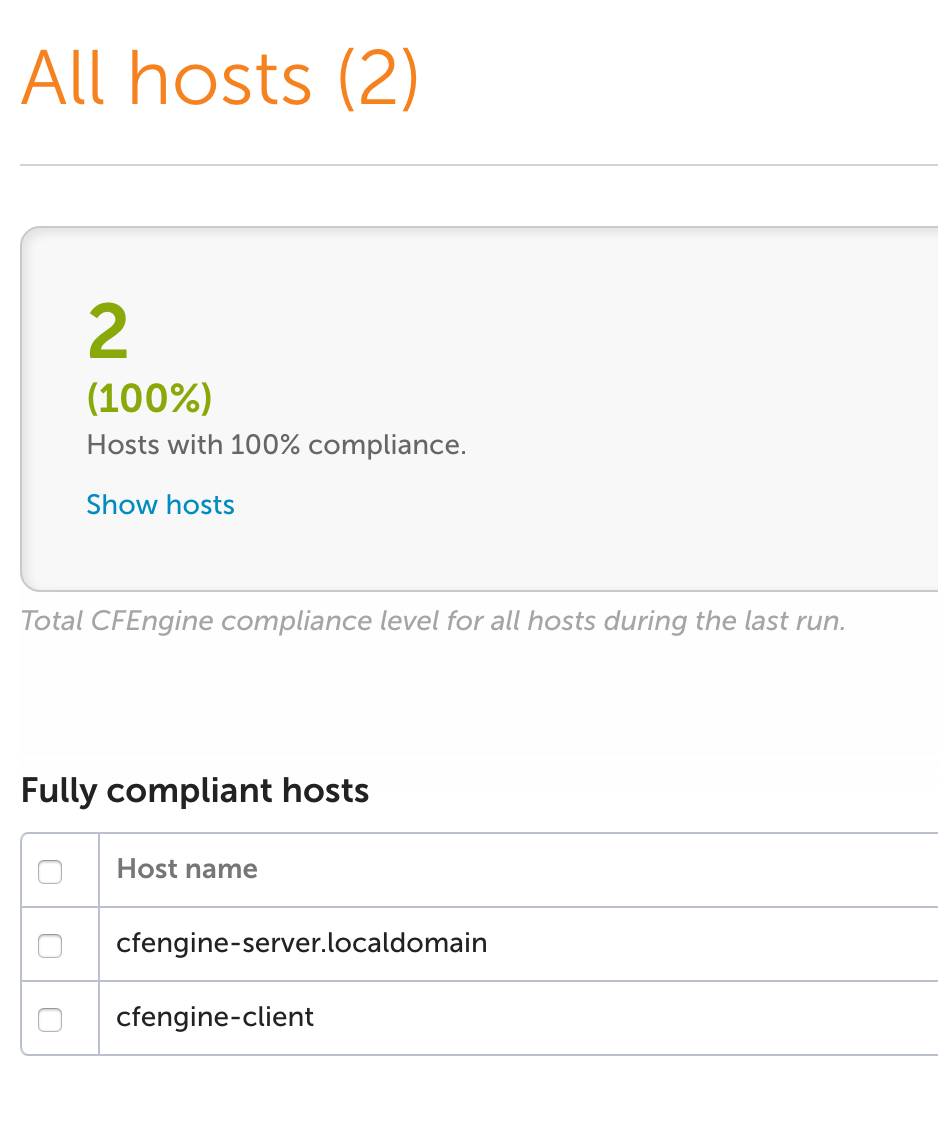
We should now be able to login to the server’s web UI by going to the floating IP address in a browser. The default login information is admin/admin. Make sure your default security group lets port 80 in.

##Setup the Clients##
Now let’s get some clients set up so that we have some systems to actually manage
with our snazzy new server. This process is almost exactly the same as the above,
with the exception of the argument passed to quick-install-cfengine-enterprise.sh.
I won’t copy/paste everything from above, but just follow the same steps and when
you get there, issue this command instead:
sudo ./quick-install-cfengine-enterprise.sh agent
One last possible caveat here. I created a Ubuntu 12.04 image with the CFEngine client installed and it caused a kernel panic on boot. I’m not sure what was going on, but using a 14.04 image worked just fine.
Once you get the client setup completed, you should see your new nodes checked in
in the web UI.